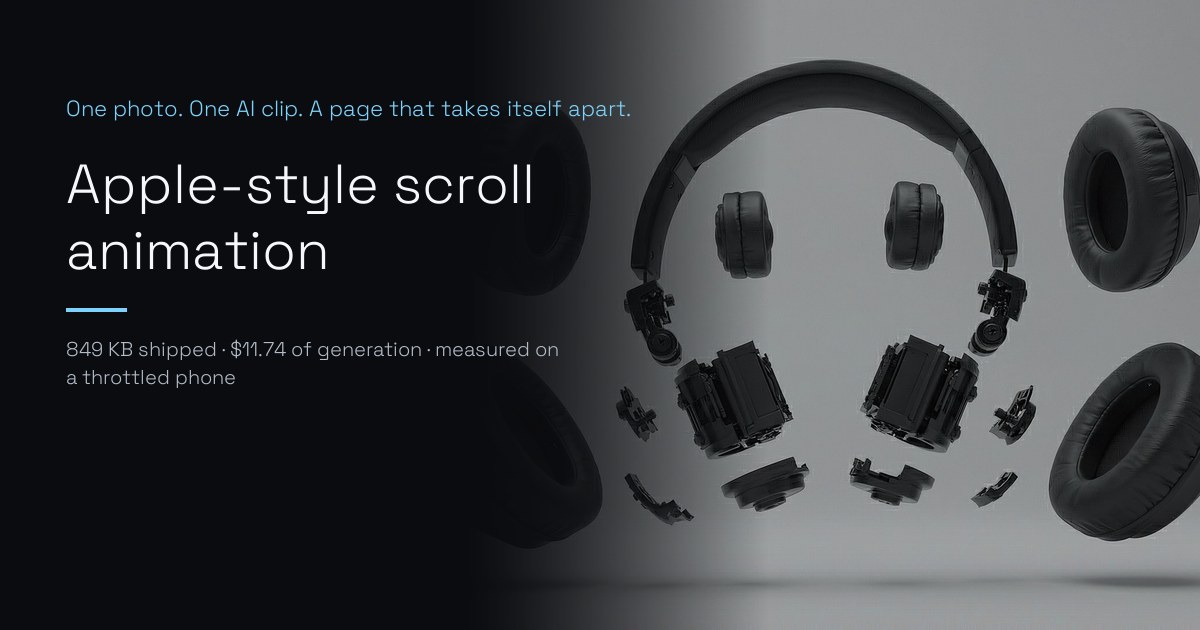
Scroll the box below.
Assembled. Start scrolling.
849 KB · 192 frames · generated for $0.64
Generate one widescreen product photo. Feed it to the video model as the first frame , because image-to-video is the only thing that stops it inventing a different product.
Roll the cheapest tier three times and keep the best. The difference between two runs of the same model is bigger than the difference between models.
Then re-encode with -g 8 and scrub the video with scroll position. An image sequence of the same clip is 4.7x heavier and takes 5x longer to become drawable on a phone.
The scroll part is old and well documented. You pin a tall section of the page, work out how far the reader has scrolled through it as a number between 0 and 1, and use that number to pick what to show. It is about fifteen lines of code and a dozen sites explain it well.
Every one of those explanations begins the same way: first, load your image sequence . Or: first, import your 3D model .
Both of those assume you already own something expensive. An image sequence is a folder of numbered still pictures, one per frame, and video runs at 24 frames a second, so eight seconds means 192 separate photographs of the same product, in the same light, from the same angle, each one slightly further through the motion. A 3D model , the .glb file those tutorials tell you to import, is a digital sculpture of the product that a 3D artist builds over days.
That is the wall. A solo builder has neither. Getting the asset was always the expensive part, and the code was never the problem.
That is what changed. You can now generate the footage, and it costs less than a coffee. What follows is the exact path, including the parts where I got it wrong, which turned out to be the useful parts. Working like this, where you test a thing and let the measurement decide, is the method I teach in Build With AI 1.0 .
I used Google's Veo 3.1 throughout, because it is what I had a key for and because the numbers in this guide had to come from somewhere specific. Nothing here depends on it.
Runway, Kling, Luma, Pika, Sora, Hailuo and Wan are all reasonable substitutes, and new ones appear constantly. The one thing your model must support is image-to-video , sometimes labelled "first frame" or "starting image". That is the feature the whole technique rests on, for the reason shown in Step 2.
If a tool only takes a text prompt and gives you back a video, it cannot do this job. The prices and the exact wording of the prompts will differ. The method does not.
Generate one still photograph first. Not a video. One image, and make it good, because everything after this inherits from it.
I call it a plate : one reference image that every later step is built from. The idea comes from my guide on keeping AI characters consistent across scenes , and the problem is identical. An image model has no memory of the last picture it made, so if you want the same product twice you have to give it a reference to work from.
The product is invented on purpose. It carries no logo and no brand marks, which keeps a published page out of trademark territory and costs nothing editorially.
Here is the whole thing. Everything that follows in this guide came out of these words:
You do not need to write any code for this step. Paste that prompt into Google AI Studio , pick the image model, and set the aspect ratio to 16:9 in the settings panel beside the prompt.
Setting it there rather than asking for it in words is not a detail. It is the first mistake below, and it cost me $0.44.
Same prompt, sent through the Gemini SDK. Useful if you are generating plates in bulk or want the aspect ratio pinned in code rather than in a UI.
Either route costs $0.039 and returns a 1344x768 image. This is the one I kept, and every clip, frame and number in the rest of this guide comes from it:
My first plate prompt said "Widescreen 16:9 studio product photograph" and ended with "16:9 widescreen aspect ratio, landscape orientation". I got back a square image .
Aspect ratio is a setting, not prompt language. Asking for it in words does nothing. You set it in the panel beside the prompt, or in the image_config field if you are scripting it.
The cost of getting this wrong is not just one bad image. Feed a square plate to Veo and the clip comes back with the product in a 1:1 box and hard black bars down both sides, wasting about 44% of the frame. So the mistake propagates into the expensive step.
That cost me $0.44 in wasted plates and clips before I read the configuration properly.
This one surprised me, and it changes more than anything else in this guide.
My second plate was correct 16:9, but composed wide. The headphones occupy 53% of the frame height, with a lot of empty studio around them. My third plate is the same product, same lighting, same everything, framed so it fills 86% .
I sent both to Veo with an identical prompt. Press play and watch how differently they come apart:
Nothing changed but the framing. The model can only take apart what it can see, and a product sitting small in a wide frame simply has fewer legible parts to work with. If your clip comes back lazy, this is the first thing to fix. Fill the frame.
Now hand the plate to Veo as the first frame . This is the whole trick, and the reason it works is worth a minute.
Most people's instinct is to describe the product to the video model and let it generate. That is called text-to-video. The alternative, image-to-video , hands the model a starting picture and asks it to animate that . It sounds like a small distinction. It is the difference between this technique working and not working.
I ran the same motion prompt twice. Once with no image, text only. Once with the plate as the first frame. Same words, same model, same settings.
Anchored against not anchored
Identical prompt and model. The only difference is whether the plate was passed as the first frame.
Text-to-video does not make a worse version of your product. It makes a different product . For a landscape that does not matter. For something a customer is supposed to recognise, it is the whole game.
Those are single frames. The clips make it plainer:
Here is the motion prompt. It is doing two jobs: naming every component that should separate, and saying when the motion starts and ends.
Again, no code required. In Google AI Studio, choose the Veo model, upload your plate as the starting image , paste the motion prompt, and set the length to 8 seconds. Uploading the plate is the part that matters. Without it you are doing text-to-video, and you get the clip on the left above.
Every other tool that offers image-to-video works the same way: there is a slot for a starting frame, and that slot is the whole technique.
Video generation is asynchronous, so this starts a job and polls it. About 45 seconds of waiting for 8 seconds of video.
About 45 seconds of waiting for 8 seconds of video.
My instinct for a scroll animation was to demand even motion, so I wrote "at a slow, steady, completely constant speed from the first frame to the last, never pausing and never speeding up". It sounds exactly right. It produced a mess: the product blew apart early and the rest of the clip was a cluster of anonymous black rings.
What worked was naming the parts and saying only that the motion begins in the first frame and completes in the last. Describe what comes apart, not how fast. The timing instruction fights the model. The parts list helps it.
The Python SDK exposes a rich config object. Most of it is rejected by the Gemini Developer API, and the errors only arrive when you call. Rejections are not billed, so mapping this cost me nothing, but it is worth knowing before you design around a field.
The seed line has a consequence that shapes the rest of this guide, so it is worth sitting with. When you get a roll you love, that file is the only copy that will ever exist. You cannot regenerate it at a higher resolution afterwards. Generate at the resolution you intend to ship.
Veo 3.1 comes in three tiers and the price gap is large: $0.05, $0.10 and $0.40 per second of output at 720p. The obvious assumption is that hero footage deserves the top one. So I ran the same plate and the same prompt through all three and looked at the same frame.
Standard looks the most coherent. Fast produced more parts but duplicated some of them. Lite is the sparsest. Read that quickly and you conclude the expensive tier is worth it.
Then I ran the control that actually mattered. Three runs of Lite. Same plate, same prompt, same settings, nothing changed between them.
Three runs of the same model, same everything
Veo 3.1 Lite, 8s, 1080p, identical plate and prompt. Frame 185 of 192 in each.
Run 3 came off the $0.05 tier and is better than the $3.20 Standard clip. Run 2 is a write-off. The spread between two runs of the same model is wider than the spread between models, which means the tier is not the variable that matters . The roll is.
Put that together with the missing seed and the strategy falls out on its own. You cannot re-roll a good result and you cannot avoid a bad one, so buy more rolls instead of more model. Three Lite rolls cost $1.20 and produced the asset on this page. One Standard roll costs $3.20 and is still one roll.
I ran Lite three times, and Fast and Standard once each. That is enough to show the variance is large.
It is not enough to rank the tiers against each other, and I am not going to pretend otherwise on a sample of one.
If you need a specific look rather than a good look, the negative_prompt support on Fast and Standard is a better argument for paying more than image quality is.
You have a clip. Two things need fixing before it goes near a page.
Both are done with ffmpeg , a free command-line tool for video. If you have never used a terminal, this is the one place in this guide where you will need one. The commands are copy-paste, and if any of them puzzle you, paste it into an AI assistant and ask what each flag does. That is how I read unfamiliar ffmpeg lines too.
First, the audio. Veo hands you an AAC track whether you want one or not, and a scroll hero is silent by definition. This command copies the picture across untouched and drops the sound:
That took my clip from 4,850 KB to 4,695 KB. A free 155 KB, and it costs nothing because the picture is copied across untouched rather than re-encoded.
Second, and this is the one that decides whether the whole approach feels good or terrible: count your keyframes.
That asks the file how many of its frames are keyframes, and counts them.
My eight second clip came back with one . One keyframe, 192 frames.
A keyframe is a frame stored in full. Every other frame only stores the difference from the one before it. So when you jump to frame 150 and there is no keyframe behind it, the decoder has to walk all the way from frame 0 to build the picture. Every scroll seek pays that.
That is the theory. I have not seen anyone put a number on it, so here is one. Both files fully downloaded first, so nothing but decoding is being timed, then 40 seek positions visited once each in random order on a CPU throttled to a quarter of its speed:
What one keyframe costs you per seek
Same 8s clip at 720p, same crf, fully buffered, 4x CPU throttle. Median of 40 unique seeks.
A screen refreshes every 16.7 ms . The dense encode lands inside that budget and the sparse one misses it by more than three frames, on every single seek. I ran it twice and got 57 against 14, then 56 against 10.
That is the whole argument for spending the bytes. The 379 KB you save by skipping this step buys you a scrub that cannot keep up with the display.
You fix it by forcing keyframes. It costs bytes, and not in a straight line:
Keyframe spacing against file size
The shipped clip, re-encoded from one master at 720p, h264 crf 28, changing nothing but -g (the gap between forced keyframes).
Even making every single frame a keyframe lands under the 4,008 KB that the equivalent image sequence weighs. The floor for this technique is lower than most people assume. Note that -g 1 is not just five times the size, it also scores worse on SSIM than -g 8 : at a fixed crf, spending every frame on a full picture buys you nothing.
This is the command that produced the file running at the top of this page. It scales the clip to 720p, compresses it, and forces a keyframe every eight frames:
-movflags +faststart matters more than it looks. It moves the index to the front of the file so the browser can start seeking before the whole thing has arrived.
High resolution, dense keyframes, small file. Pick two.
I encoded the same 1080p master at -g 4 and got 3,436 KB , which is heavier than the image sequence it was supposed to beat. Dropping to 720p at -g 8 gave 847 KB, and seeks got faster rather than slower.
A scroll hero is displayed at whatever height the viewport allows, and it is constantly in motion. It needs the keyframes far more than it needs the pixels.
Now the easy half. A tall track, a sticky stage inside it, and scroll position mapped onto currentTime . You do not have to write any of it by hand.
But you cannot just ask for it either, and this is the part worth slowing down for.
The obvious way to write this is one line: work out how far down the page you are, multiply by the video's duration, assign it to currentTime . Almost every tutorial does exactly that, so it is what an AI assistant will hand you by default. That version is broken. It looks fine while you test it slowly and falls apart the moment a real person scrolls at a real speed, for a reason I measured and put below.
So the useful thing here is not the code. It is knowing what to insist on. Give your assistant this:
Why hand over a spec instead of a description? Because every one of those five points is something the model will otherwise get wrong, and four of them fail quietly . You will not see a broken build. You will see a page that works when you test it and looks frozen to your readers.
Read the two mistake boxes below before you accept whatever comes back. They are the failures that cost me the most time on this build, and both of them looked like success.
This is what the prompt above should produce, and what runs at the top of this page. Useful as a reference to check the output against.
The first version of this page shipped without the seek() wrapper. It assigned currentTime straight from the scroll handler, which is what almost every example does. Hasan opened it and told me the labels were moving but the image was frozen .
A video element services one seek at a time . Assign currentTime while seeking is still true and the browser silently discards it. Scroll slowly and each seek finishes before the next one arrives, so it looks fine. Scroll at a normal speed and most updates are thrown away, and the picture parks on whichever seek last completed. Meanwhile the caption and the progress bar, which are ordinary DOM writes, keep updating perfectly. That gap between moving text and a frozen frame is the tell.
Measured on the broken version in Chrome and Edge: with 120 ms of settling between steps, 2 of 9 seeks were dropped. Under a continuous scroll, 8 of 40 updates arrived while a seek was already in flight. Holding the latest target and re-applying it on seeked takes both to zero, because the final position is always honoured even when every update before it was discarded.
Five things are doing real work in that file. Read whatever your assistant produces and confirm each one is present, because four of the five fail silently:
That list is the real deliverable of this step. The code is fifteen lines and any assistant can write it. Knowing which fifteen lines are wrong is the part that took me a day.
This one cost me the most time, and it will hit you too. I built the demo, it worked, Hasan opened it locally and the picture was frozen on the first frame while the captions kept updating.
Seeking a video needs HTTP Range requests . The browser asks for bytes 1000-2000 and expects 206 Partial Content . A server that instead replies 200 with the whole file leaves the browser reporting video.seekable as [0, 0] . The clip downloads, it is fully buffered, readyState is 4, and every single currentTime you assign is clamped straight back to zero.
Django's development static server does not support Range. So with DEBUG=True this technique cannot work, no matter how correct your code is. Check with one command:
206 Partial Content means you are fine. 200 OK means you will spend an afternoon debugging JavaScript that was never broken. WhiteNoise, nginx and every CDN answer 206. Serve the clip from one of those, or from a CDN, and it works immediately.
Your clip has a fixed number of frames. Veo returns 24 frames per second , so eight seconds is 192 frames . That is every distinct picture the reader can ever see, and it has to cover the whole scroll distance you gave the track.
At height: 400vh on a 900px viewport, that is roughly 2,700 pixels of scrolling spread across 192 frames: about 14 pixels of scroll per frame. Comfortable. Push the track to 1000vh and you get one new frame every 35 pixels, and the animation visibly steps. Track height and clip length are one decision, not two.
Hijacking the scrollbar is a strong move and some people physically cannot tolerate it. Wrap the pinning in @media (prefers-reduced-motion: reduce) , drop the sticky behaviour, and show a single still instead. The demo at the top of this page does exactly that. It costs about six lines.
The alternative approach is to export the clip as stills and draw them into a canvas. It is the technique most people reach for. I built both against the same clip and measured them with Playwright: desktop, then an emulated mid-range phone at 412x915 with a 4x CPU throttle , driving an identical 60 step scroll through the pinned track. Every timing below is the median of five runs , because a single run of this cannot tell a real difference from noise.
The weight and the time to first picture are the clear wins. The scroll time is the interesting one, and the median undersells it.
Across those five runs the video's scroll time stayed inside a 43 ms band, from 1,848 to 1,891. The canvas swung 626 ms , from 1,982 to 2,608. That spread is the number that matters, because nobody perceives an average. What a reader notices is the run where it stutters, and the sequence has one of those and the video does not.
Be straight about the other half of this: on desktop the two are a dead heat. Scroll times came out within 1% of each other, and there the canvas was marginally the steadier. This is a mobile advantage, not a universal one. It is also the half that matters, because the phone is where these pages fall over.
What each approach weighs
The shipped clip, 192 frames, 720p, every format encoded from the same master.
Cutting the sequence to every fourth frame still lands at 1,904 KB, and it costs you three quarters of your frames. There is no version of the image sequence that wins on weight.
Every generation, including the mistakes and the ones that failed:
If you already know what you are doing, which you now roughly do, the cost of one hero is the plate plus three rolls: $1.24 at 720p, or $1.96 at 1080p. The $11.74 is what it cost to find the path, and most of it went on the tier comparison that turned out not to matter.
Six of my findings cost nothing at all, because rejected and failed generations are not billed . Every unsupported setting in that table earlier was discovered for free.
I would not use this technique for everything, and it is worth being straight about the edges I hit.
Yes, if you anchor it with a first frame. Text-to-video invented a different pair of headphones from the one I described. The same prompt with the plate attached kept the shape, the materials and the softbox reflection, and separated it into pads, drivers and hinge hardware.
Probably the cheapest. Three runs of Lite at $0.05 per second produced one unusable clip, one moderate one, and the best asset in the project, which beat a single Standard run at eight times the price. Buy more rolls, not more model. The real reason to pay for Fast or Standard is negative_prompt support, which Lite does not have.
Video, provided you re-encode with dense keyframes. On a CPU-throttled phone the sequence was 4,010 KB across 193 requests and took 585 ms to become drawable. The video was 849 KB across 2 requests and took 117 ms. Across five runs the video's scroll time stayed inside a 43 ms band while the sequence swung 626 ms.
Keyframe spacing, almost always. A default encode of an 8 second clip can contain a single keyframe, so every seek decodes from the start. On a throttled CPU that measured 57 ms per seek against 14 ms for the same clip at -g 8 , and a display refreshes every 16.7 ms. Re-encode with -g 8 .
No. The SDK has a seed field and the Gemini Developer API rejects it. Generate at the resolution you plan to ship, because you cannot go back for a bigger version.
Unmeasured. I tested Chromium only. WebKit handles video seeking differently and I would test on a real device before shipping this to an audience that skews iOS.
The useful part here was not the prompt. It was running the control: three rolls of the same model, which turned a confident conclusion into the opposite one and saved 8x on every hero after it.
Building that reflex, where you check the thing you assumed instead of shipping it, is what Build With AI 1.0 is really about. 12 days, one real product, nothing skipped.
Tested on: Veo 3.1 (lite / fast / standard) · Gemini 2.5 Flash Image · google-genai 1.56.0 · ffmpeg 7 · Chromium via Playwright, desktop and emulated 412x915 at 4x CPU throttle. Lab run: 2026-07-31. Last verified: 2026-07-31. Every price, byte count and timing on this page came from that run. 18 billed clips, 4 images, $11.74 total.
Now go build something worth scrolling.
Hasan Aboul Hasan builds open-source tools and teaches solo developers how to build, host, and sell AI-powered products. Founder of LearnWithHasan.com , creator of SimplerLLM and PyRunner .
The exact building blocks I use to ship real products with AI — yours as a free PDF.
Have a question? Ask it in the community — it's tagged #guide and linked back here. Reading is open to everyone; posting needs a free account.