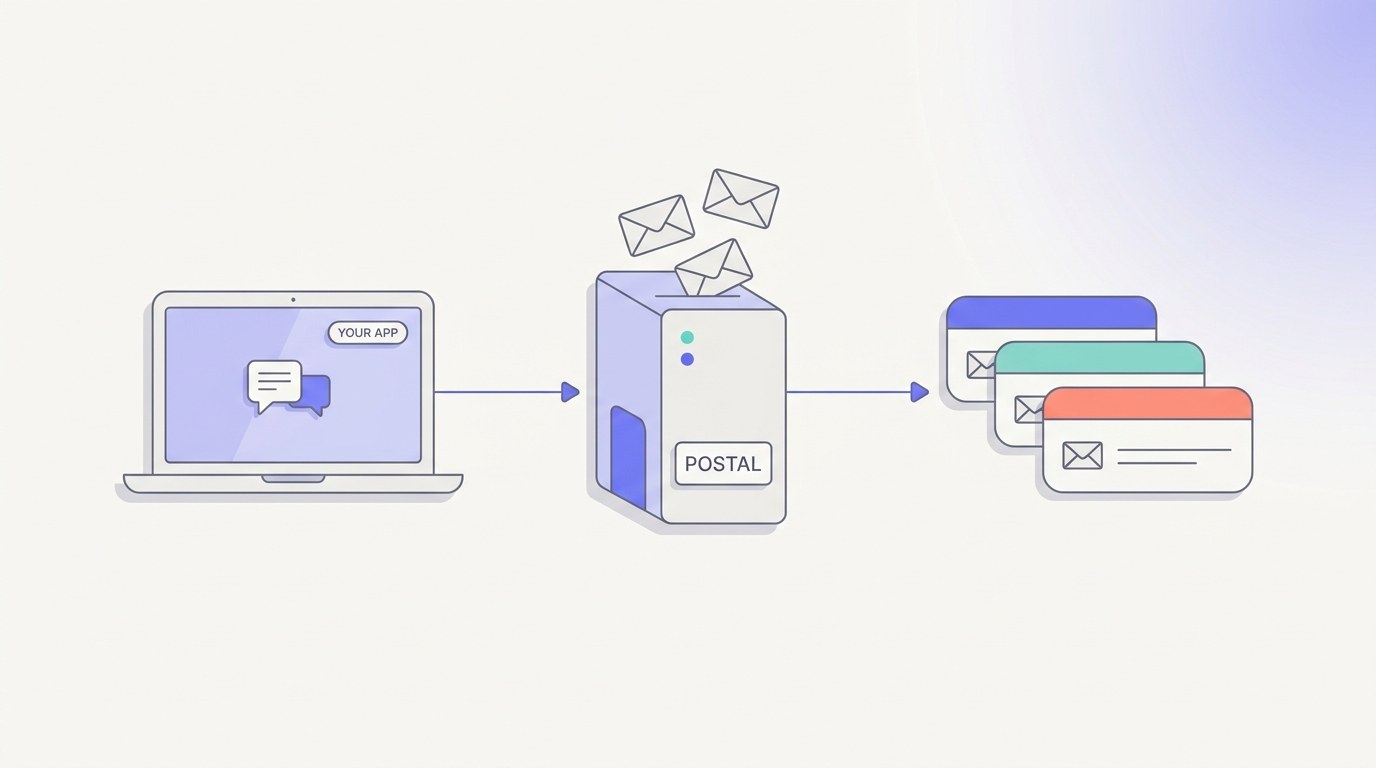
Postal is a free, MIT-licensed mail server you self-host on your own VPS. This guide takes you from a blank Ubuntu server to a production-ready Postal install (SMTP relay, HTTP API, SPF + DKIM signing, HTTPS dashboard, daily backups) in about 30 minutes for ~$5/month.
If you send emails from your apps, you know the pain of SaaS pricing. Mailgun , SendGrid , Postmark all charge per email, and the costs add up fast .
Postal is the open-source way out. It's a self-hosted mail delivery platform you run on your own VPS. Same features as the big SaaS providers (SMTP relay, HTTP API, click tracking, bounce handling, webhooks), but you own it .
This guide is the easy mode . It uses Postal's official one-liner installer and the simplest path I've found that still ends with a real, production-ready setup. Strong database password, firewall enabled, automated backups, the works. Good enough to put in front of your real customers for signup emails, receipts, and password resets.
When you're ready to scale (IP pools, marketing volume, multi-tenant, reseller setups), that's a separate advanced guide I'll publish later.
By the end of this one, you'll have a working Postal install sending real emails from your own server , ready for your website.
📦 What you're getting: A working production-ready mail server with web UI, SMTP relay, HTTP API, DNS-verified domains (SPF/DKIM), HTTPS, a firewall, and daily backups. Safe to use for transactional email from your apps and sites.
Postal is a free, open-source mail delivery platform built for sending transactional and bulk email from your own infrastructure. Think SendGrid or Mailgun, but you run it yourself.
Postal shines when you want to send email from your apps, SaaS, or transactional systems.
1. Cost. SaaS providers charge per email. At scale, $50–500/month is normal. A $5/month VPS running Postal can send 100k+ emails with no per-email cost .
2. Control. You own the data. You decide the retention. You set the limits. No surprise account suspensions.
3. Deliverability is on you. With self-hosting, your IP reputation is your responsibility. If you do it right, deliverability is excellent. If you don't, your emails go to spam.
Self-hosting Postal makes sense if you send 10k+ emails/month, need full control over headers and routing, or want to learn how email infrastructure actually works.
If you only send a few hundred emails a month, just use Resend or Postmark. The math doesn't work yet.
💡 Curious how much you'd save self-hosting your whole stack?
The Self-Hosting Course walks through replacing your SaaS bills (email, hosting, databases, automation, the works) with self-hosted equivalents, with the exact setup for each.
→ Explore the Self-Hosting Course
Here's the checklist:
The biggest blocker for most people is port 25 . AWS, Google Cloud, DigitalOcean, and Vultr block it by default. That's why VPS choice matters more than anything else for self-hosting Postal.
You need a provider that allows outbound SMTP on port 25. A few that work well for Postal on a cheap plan with at least 4 GB of RAM: Contabo and Hetzner (port 25 open by default), plus Kamatera and Hostinger . Always confirm the current Port 25 policy with the provider before you commit. It can change.
I use Contabo for most of my Postal installs. Port 25 is open out of the box, the price-to-RAM ratio is unbeatable, and the sending limit of about 25 emails per minute is fine for transactional and small-to-medium volume.
I run the same Contabo + Coolify stack for PyRunner (my Python automation platform) and a handful of other self-hosted services. Same philosophy: own the stack, skip the SaaS bill.
For the rest of this guide, I'll use Contabo. The steps are the same on any Ubuntu 24.04 VPS with port 25 open.
🔗 Looking for more options? The two providers I trust for Postal are Contabo and Hostinger , both with port 25 open. For more self-hosting picks, see the Self Hosting Hub .
Your Postal hostname & server IP (optional)
Drop your real values in here and every command, code block, and reference below auto-fills. Copy-paste, no find-and-replace. Values stay in your browser only. Nothing leaves this page.
Values stay in your browser only. Nothing leaves this page.
Once provisioned, SSH into your server:
This is the first thing I do on any new mail server. If port 25 is blocked, nothing else matters.
You should see something like:
If it hangs or says "connection refused," port 25 is blocked. Contact support before continuing.
Type quit to close the connection.
Your VPS needs a proper hostname that matches the domain you'll use for Postal. I'll use postal.example.com throughout this guide. Replace it with your actual domain.
Should return: postal.example.com
Before exposing anything publicly, lock down the server. We'll allow only the ports Postal actually needs and block everything else.
Without this step, Postal's admin UI (port 5000) is reachable from the open internet over unencrypted HTTP. Don't skip it.
You should see all five ports listed as ALLOW :
This is the step most guides skip. It's a deliverability killer.
Reverse DNS (PTR) maps your server's IP back to a hostname. Gmail, Outlook, and most major providers check this. If YOUR_SERVER_IP doesn't resolve back to postal.example.com , your emails go to spam regardless of how clean everything else is .
Verify it from your SSH session (give it a few minutes to propagate):
Should return: postal.example.com.
Don't skip this step. If you do, expect everything you send to land in spam.
Add an A record for your Postal hostname at your DNS provider ( Cloudflare , Namecheap, GoDaddy, whatever you use):
If you use Cloudflare, turn off the orange cloud (proxy) for this record. Postal handles its own SSL.
Wait a few minutes, then test:
Should return your server IP.
You'll add more DNS records (SPF, return path, etc.) in Step 8. The interactive generator below will spit out everything you need.
Postal's official install script runs into a known git redirect issue on modern Ubuntu (the script clones from a vanity URL that redirects to GitHub, and modern git blocks cross-host redirects for security). We'll do the same thing the script does, but cleanly.
This takes 1–2 minutes. Verify:
Verify the postal command works:
You should see a list of commands ( start , stop , bootstrap , initialize , etc.).
Why not use the official one-liner? The upstream install script tries to clone from https://postalserver.io/start/install , which 301-redirects to GitHub. Modern git refuses cross-host redirects by default (a security setting in place since 2020). Cloning the GitHub URL directly avoids the problem entirely.
Now start MariaDB in Docker with a strong password, a pinned version, and a persistent volume.
It'll output something like aB3xK9pL2mNqR7vW5tY8jZ4hC6sE1dF . Copy this somewhere safe right now. You'll paste it into the next command and into postal.yml in Step 8.
Run this, replacing YOUR_STRONG_PASSWORD with the password you just generated:
This pins MariaDB to version 11.4 (so future MariaDB updates don't break things), creates a Docker volume named postal-mariadb-data (so the database survives container restarts and rebuilds), and binds the port to 127.0.0.1 (so it's only accessible from the server itself).
You should see [Note] mariadbd: ready for connections near the end of the logs.
⚠ The MariaDB port is bound to 127.0.0.1:3306 , so it's only accessible from the server itself. Combined with the firewall, the database is never exposed to the internet.
Now generate the Postal config files:
This creates three files in /opt/postal/config/ :
The bootstrap command pre-fills most of postal.yml correctly. You only need to update the database credentials with the strong password you just set.
Find the main_db and message_db sections. Update both to use root as the username and your strong password:
Save the file ( Ctrl+O , Enter , Ctrl+X ).
That's the only edit you need to make. Everything else in postal.yml was auto-generated correctly.
This is the part most people get wrong. Postal needs several DNS records to work. Get one wrong and your emails go to spam.
I built an interactive DNS records generator. Enter your hostname and server IP, and it gives you every record you need to copy-paste into your DNS provider:
Enter your Postal hostname and server IP. Copy the records straight into your DNS provider. No more typos breaking your mail server.
Here's what you'll be adding:
Add all of them now. DKIM and per-domain SPF come later (Postal generates those for each sending domain you add).
Wait 5–10 minutes for DNS to propagate. You can check with:
This creates all the database tables Postal needs:
You should see a bunch of "creating table..." messages and finish with no errors. If you see a database connection error, double-check the password in postal.yml matches what you set in Step 7.
Then create your first admin user:
It'll prompt you for:
Save these credentials. This is how you'll log into the Postal web UI.
This boots up the web server, SMTP server, worker processes, and the cron container. Check they're all running:
You should see green status for each component.
Postal listens on port 5000 by default, but the firewall is blocking 5000 from outside. We need Caddy to terminate HTTPS on port 443 and proxy to Postal internally.
Caddy handles SSL termination automatically with Let's Encrypt . The bootstrap command already created a Caddyfile for you. Just run it:
Caddy will read the Caddyfile , request a free SSL certificate from Let's Encrypt (using port 80, which we opened in the firewall), and start serving HTTPS on port 443, proxying requests to Postal on port 5000.
Give it 30–60 seconds. Then visit:
You should see the Postal login page with a valid SSL certificate.
Log in with the admin credentials you created in Step 10.
Postal organizes things hierarchically: Organization → Mail Server → Domain → Credentials .
Now add the domain you'll send emails from. This is different from your Postal hostname.
For example, your Postal hostname might be postal.example.com , but you'll send emails from [email protected] . You add mycompany.com here.
Add both records to your DNS provider for mycompany.com , then click Check DNS Records . Postal will verify both are correct.
Once both are green, your domain is ready to send.
Now test sending an email. From your local machine (not the server, since you want to verify the SMTP listener is reachable from outside):
Install swaks with brew install swaks (Mac) or apt install swaks (Linux).
Check your inbox. The email should arrive in seconds.
Then check the message in the Postal UI under Messages . You'll see the full delivery log, headers, and status.
If it landed in your inbox (not spam), Postal is working. One more step to make it production-ready: backups.
Your Postal database holds every message log, suppression list, domain config, and credential. If the server dies or the database gets corrupted, you lose all of it . Daily backups are a five-minute setup that saves you from real pain.
Create a backup script:
Replace YOUR_STRONG_PASSWORD in the script with your actual MariaDB password:
Lock down permissions (only root can read or run it):
You should see a postal_YYYYMMDD_HHMMSS.sql.gz file.
Add it to cron to run daily at 3am:
Verify the cron job:
⚠ For real safety, copy backups off the server. A backup on the same server doesn't help if the server itself dies. Use rclone to sync /opt/postal/backups/ to S3, Backblaze B2 , or your own machine. That's covered in the advanced guide.
This is the most common issue. Causes, in order of likelihood:
Test your full setup at mail-tester.com and aim for 9/10 or 10/10.
Either the SMTP container isn't running ( postal status to check), or your firewall is blocking port 25. Verify:
Should show 25/tcp ALLOW . If not, add it: ufw allow 25/tcp .
Most common cause: the password in postal.yml doesn't match the MariaDB password you set in Step 7. Check both match exactly.
If you forgot to allow port 22 before enabling ufw and lost SSH access, use your VPS provider's console access (Contabo has a web-based VNC console) to log in and run ufw allow 22/tcp .
You have a working, secured Postal install with daily backups. Here's what to do next:
You just self-hosted your email. The same approach (Docker, a VPS you own, no SaaS rent) works for your entire stack.
That's what Self Hosting 2.0 covers. 34 lessons walking through everything I run on the same Coolify stack as Postal: web apps, databases, automation tools (n8n), password managers (Vaultwarden), analytics (Plausible), object storage, monitoring, backups. Same builder-to-builder approach, same anti-SaaS bill philosophy.
If this guide saved you the cost of one month of SendGrid, the course pays for itself the first week .
$69, lifetime access
This guide is the starting point. I'm writing focused follow-ups for specific scenarios:
I'll link each one here as they publish.
This setup gets you about 30 minutes from a fresh VPS to a real, secured, backed-up mail server ready for your customers.
It's not a toy install. The database has a strong password, the firewall blocks everything you don't need, the data persists across reboots, and backups run daily. You can put it in front of real users today.
When you outgrow it (marketing volume, multiple sending domains for clients, high-volume bulk sending), the advanced guide will be there. For now, this is enough.
If you run into something I didn't cover, let me know. I keep this guide updated.
Postal v3.3.6 is the latest stable release ( released April 28, 2026 ). The installer pulls the latest version automatically.
Technically yes, but I don't recommend it. Postal runs MariaDB, RabbitMQ, multiple Ruby processes, and Caddy. With less than 4GB you'll hit out-of-memory issues under load.
Yes. After completing all 16 steps, you have a strong database password, a firewall that blocks everything except the ports you need, persistent data across container restarts, daily backups, HTTPS, and proper DNS authentication (SPF, DKIM, PTR). That's enough for transactional email from a real product.
The advanced guide covers things you'd add when scaling up (IP pools, marketing volume, multi-tenant), not things you'd need for a normal SaaS sending its own emails.
Yes, but in a specific way. It can receive emails and forward them to HTTP webhooks or other addresses via "routes." It doesn't store emails for you to read like Gmail. For that, use Mailcow or iRedMail .
It depends on your VPS and your IP reputation, not Postal itself. On Contabo, the provider limits you to ~25 emails/minute (1,500/hour). On a dedicated server with no provider limits, Postal can push tens of thousands per hour.
Postal is free and open source (MIT license). You only pay for the VPS hosting it runs on. Around $4–10/month gets you a fully working setup.
Yes. Both services use standard SMTP. Just swap the SMTP host, port, username, and password in your app's config. The hardest part is warming up your new IP. Don't switch 100% of traffic on day 1.
Often yes, for one reason: deliverability .
If your server has an IPv6 address, Linux will prefer IPv6 over IPv4 when sending email. The problem is that most VPS providers (including Contabo) don't automatically configure reverse DNS (PTR) for the IPv6 address, only for IPv4. Gmail and Outlook both check IPv6 PTR strictly. If they can't match the connecting IPv6 to a hostname, your mail goes to spam or gets rejected outright.
The cleanest fix is to disable IPv6 at the kernel level so Postal only sends over IPv4 (where your PTR is already set up correctly from Step 4).
Create a sysctl config file:
Apply it immediately:
Verify IPv6 is gone:
The output should be empty (or just the loopback if it's stubborn, which is fine).
After disabling, restart the Postal containers so they pick up the IPv4-only config:
To re-enable later (if you set up IPv6 PTR properly with your provider), delete the file and apply:
Backups are gzipped SQL dumps in /opt/postal/backups/ . The script keeps the last 7 days and deletes older files. To restore:
Test your restore on a non-production server before you actually need it.
The one-liner script is for Ubuntu (tested on 22.04 and 24.04). For other distros, you'd install the prerequisites manually.
The Postal team published a k8s-hippo repo with Kubernetes configs, but it was archived in March 2024 and is no longer maintained. For a Kubernetes deployment today you'll likely need to build your own Helm chart from the official Docker images. For a single-server setup, the Docker path in this guide is much simpler.
🧰 What's next? Browse more guides at the Self Hosting Hub , or check out the Self-Hosting Course to replace your SaaS stack step by step.
📬 If you build something with this , send me a note. I love seeing what people ship.
Go hit send from your own server.
Hasan Aboul Hasan builds open-source tools and teaches solo developers how to build, host, and sell AI-powered products. Founder of LearnWithHasan.com , creator of SimplerLLM and PyRunner .
The exact building blocks I use to ship real products with AI — yours as a free PDF.
Have a question? Ask it in the community — it's tagged #guide and linked back here. Reading is open to everyone; posting needs a free account.