Introduction This HOW TO is the first of two. This one is meant for beginners who just bought a Neo and want to connect it to the Internet and want to see their sensor data online. The second HOW TO will be about controlling the Neo’s Arduino in and ouputs through a local website on your Neo, so you can control it from everywhere in your house and from every connected device (smartphone, laptop, desktop) that has a web browser.
So this HOW TO is about sending sensor data to an IoT dashboard cloud supplier like Thingspeak . But there are more like for example data.sparkfun.com
Summary 1: Create a Thingspeak channel so we can upload data to this IoT cloud hosting. 2: Connect the Neo to the Internet so it can connect to Thingspeak. 3: Create a Python program on the Linux side to send the data to Thingspeak. 4: Create an Arduino sketch for reading sensor data and sending it to the Linux side. 5. Check your Thingspeak channel and confirm data transfer. 6. Read multiple sensors and send to Thingspeak.
Let’s begin! If you have any questions on this How To you are free to ask, just comment this thread.
Step 1: Create a Thingspeak channel. Create Thingspeak channel with 1 temp field. You can use the following instruction: https://nl.mathworks.com/help/thingspeak/collect-data-in-a-new-channel.html Step 2: Connect the Neo to the Internet. For connecting the Neo to the internet you can use the following instruction: Use Neo as a headless IoT Device
Step 3 : Create a Python program on the Linux side to send the data to Thingspeak. Copy this Python code, save it as UdooNeoSensor.py in your home folder on the Neo. Replace the key value with your own Thingspeak Write API Key Python is preinstalled on the Neo so you dont have to install anything for this. After saving this Python code you can run it ín a linux terminal console: sudo python UdooNeoSensor.py We are using the Linux /dev/ttyMCC serial device that is implemented on the Neo for communicating between the Linux and Arduino side. Tip: To copy the code open the Neo desktop through VNC Remote Desktop so you can copy/paste it from your web browser on your PC to the text editor (leafpad) on the Neo with the standard Ctrl-C Ctrl-V commands.
Step 4: Create Arduino sketch for reading sensor and sending it to Serial Use the following code to read an Arduino analog (temperature) sensor on pin A0 and send it to serial (see also https://www.arduino.cc/en/Tutorial/AnalogReadSerial for more info). I modified the code a bit to slow down the read frequency and to be sure the data is send to the Linux side of the Neo. Copy the code in a new sketch (as a start use the IDE on the Neo) and save it. Compile and upload it to the Arduino side of the Neo. You can check the results of this sketch with the Serial Monitor of the Arduino IDE. You first have to send a character to the Arduino in order to get the sensor data displayed (every 16 seconds). Be sure the Python program is not running, else you will get a reading conflict of the /dev/ttytMCC serial device.
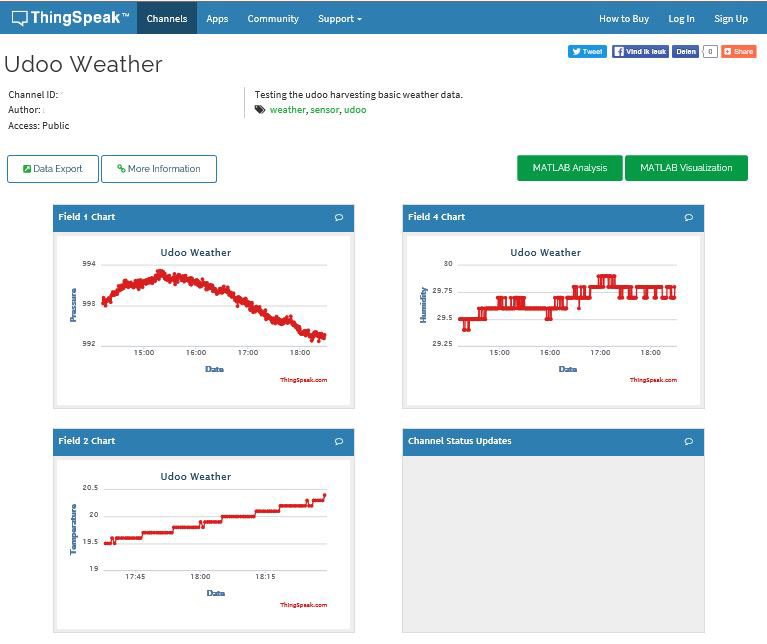
Step 5: Check your Thingspeak channel and confirm data transfer Be sure the Python program and the Arduino sketch are running. Open your Thingspeak channel and you should see the temperature uploading into Thingspeak website.
You can check my data here: https://thingspeak.com/channels/144274 I did not change the value of the sensor so this is a very straight line You can download the values and there is an update every 16 seconds: 2016-08-10 23:22:00 UTC,12,685 2016-08-10 23:22:17 UTC,13,684 2016-08-10 23:22:33 UTC,14,685 2016-08-10 23:22:49 UTC,15,684 2016-08-10 23:23:06 UTC,16,684 2016-08-10 23:23:22 UTC,17,685
Step 6 : Read multiple sensors and send to Thingspeak If you have more sensors you can send all data in one string (use Serial.print() and end with a Serial.println() ) to the A9 and split this string into multiple values again in Python. I will add an example for that later.
References Use Neo as a headless IoT Device UDOO NEO Serial Communication Examples Python programming for beginners
Disclaimer: I am not a programmer, just a computer enthusiast. The code provided is tested but is not guaranteed to be the best in class. The code and How To is written for beginners to give a start in using the Neo. At the moment this How To is work in progress so updates are foreseen.
Originally written by: waltervl
If you got any question, suggestion or idea, just visit our forum and comment the following topic: https://www.udoo.org/forum/threads/how-to-make-udoo-neo-an-iot-gateway-of-sensors.6103/#post-23911