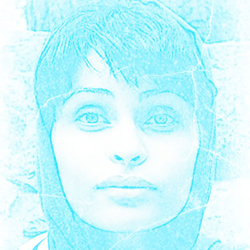
In this tutorial I want to show you how to apply a frozen effect to a woman portrait. I really love this portrait, compliments to the photographer and I also love the result. I didn't use Wind Filter. You can add it if you want to.
Open in a new psd file this photo http://www.flickr.com/photos/hamed/590034637/ .
Duplicate this layer abd call it Base. Hide the initial layer.
Draw a new Rectangle with Rectangle Tool, color # 94f7f5. Go to Filter - Sketch - Reticulation, Density 4, Foreground Level 22, Background Level 11. Call this layer Blue.
Place the Base Layer on top of Blue Layer. Set the Blending Mode of Base Layer to Overlay 100%. Now you should have a result like this:
Duplicate Base Layer and call it Sketch. Set the Foreground Color to #1b928f , Background Color white. For this layer apply a new filter; Filter - Sketch - Photocopy(Detail 1, Darkness 50).
Draw a new Rectangle this time the color is #138090 ; call this layer Frame. Set the Blending Mode of this layer to Hue 100%. Go to blending Options and check Inner Glow to make a nice frame.
I found a very nice crack texture so I will add it to this image. You can find it here http://www.flickr.com/photos/loxleyimages/2440555345/in/set-72157605663056066/ .
First rotate this layer Edit - Transform - Rotate (angle 90). The question now is where to put this new layer.
I put this layer between Base Layer and Sketch Layer ; I changed the Blending Mode from Normal to Screen 100%.
Interesting Ice Text Effect
Industrial Nightmare Movie Poster