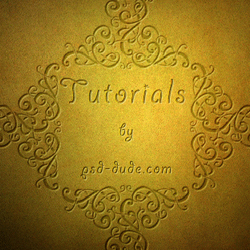
Learn how to create a beautiful golden engraved decoration that you can use to create a fairytale book cover or you can add it to your scrapbook. Using the same technique I will also make an engraved text effect.
We'll start by adding a nice floral border using a set of Photoshop corner brushes . I hope you will like the effect, so let's start!
Create a new document with this size: 480/340 pixels.
Let's start by preparing the background. I was thinking about a nice golden texture. So I stat looking on the internet and I have found on Flickr this really nice background (unfortunately the image I used is no longer available) on DeviantArt this beautiful gold texture (in order to get a similar result with the original image you have to Add Noise amount 8%, uniform, monochromatic; then you must add a Vignette by adding a layer style with Inner glow, blend mode Multiply, opacity 70%, color black and size 115; to add some more brightness towards the center you can use the Dodge Tool).
Copy this texture into your file and call this first layer "Gold" Layer.
Create a new layer and call it "Vintage Border".
Now go to myphotoshopbrushes.com and download this set of brushes.
Download the brushed, unzip the files and put the abr file into a folder on your computer. Return to the Adobe Photoshop file and select the Brush Tool, load the downloaded brushes and select the brush indicated in the image (named "ornament4").
Now set the color to white and add the shape you selected right in the middle of the screen just like in the picture.
Select half of the shape and delete it. We do this because we need to make a frame for the writing we are going to put in the middle. After you delete one half you should get something like this.
Duplicate the "Vintage Border" Layer and use the Edit > Transform > Flip Horizontal option to get the sides of the border. Duplicate one more time and use Edit > Transform > Rotate by 90 degrees to get the top of the border. Again duplicate this last layer and use Edit > Transform > Flip Vertical. Good, now you have the four sides of the border. What you need to do is arrange them by moving them in a square shape. Merge the four layers and then resize it to fit the image This will become the new "Vintage Border" Layer. You should get something like this.
Duplicate the "Vintage Border" Layer and use Image > Adjustments > Invert to get an identical border except it will be black. Name this new layer "Vintage Border Black". Now, you have to make sure that the "Vintage Border" Layer is on top of the "Vintage Border Black".
Move the "Vintage Border" Layer down and to the right 1px and then change the blending of the layer to "Soft Light" 100% opacity.
Select the "Vintage Border Black" Layer and set the opacity to 70%. And there you have it, it looks like the pattern is engraved.
The result is very nice, but to make it look even better let"s add some texture to the engraving. Press CTRL+Click on the thumbnail of the "Vintage Border Black" Layer to make a selection in the shape of the black pattern. Using this selection make a copy from the "Gold" Layer by clicking on the layer and pressing CTRL+C. Paste the selection into a new layer and name it "Texture". Bring the "Texture" Layer forward and make it the topmost layer. Set the blending of the "Texture" Layer to Overlay.
And there it is, the final result after adding some text and a square border using the same techniques. You can also use this techniques for any sort of background texture like copper, wood, silver, brass, etc.
Chocolate Tablet Effect