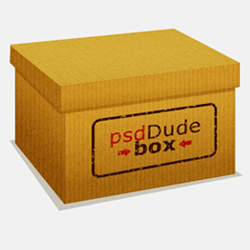
Time for another easy to follow Photoshop tutorial . Today I want to make a box icon entirely from scratch. It is a vector box and you can easily apply different textures and colors to it. As an example I have applied a cardboard texture made in a previous tutorial.
I really hope you will enjoy reading this tutorial on how to create your own box icon. So let's start!
In order to create a good quality icons there are few rules that you have to obey.
1. For example it is not necesarry to make an 100% realistic object but you have to capture the main characteristics of that object. If it is a 3D icon you have to be careful to obtain the right perspective otherwise your icon will look weird. It is always better to have a real model, it is always easier and you can not fail.
2. You also have to be careful with the lighting and shadow. Because we use multiple layers we have to make sure that the source of light is the same for every layer that composes the object icon.
3. The icons have predefined sizes from 16x16 up to 256x256 pixels. So it is always better to conform with these standard sizes. Some people say it is better to create a vector icon so that you can scale it and mentain the same quality. But it is also true that in smaler sizes like 16x16 even the vector icons don't look good. The only solution for that problem is to recreate the small icon eventually with fewer details.
These are just few of the rules and all make sense, you probably follow them without realising. If you want to learn more about icon design I suggest you read this article Icon Design Tips , I hope to finish reading it myself soon, I am not very good at reading I preffer writing :)
The benefit of using vector shapes and paths is that it is not limited to resolution if it is resized to a smaller/bigger size. In any case the shape maintains quality and sharpness. Vector Shapes can also be reshaped, you can add styles, etc.
Photoshop is not a perfect software for vector drawing like Illustrator. On the toolbar there are three tools made for drawing vector shapes, respectively, the 'Pen Tool (P)', the 'Path Selection Tool (A)' , the 'Shape Tools (U)'. With the Pen Tool you can easily draw, adding points or lines. With thePath Selection Tool you can select a shape and move it, extract one shape from another, intersect shapes etc. The Shape Tools are predefined shapes like rectangle, ellipse, lines. The Custom Shapes Tool is in fact a list of other different tools like arrows, flowers, stars, etc. I will explain some vector features when we are going to use them.
First I need to decide what is the best angle for my box and to start drawing. I want to draw to box with the top but with the posibility to take off the top. So in the first case(with the top on) there are just three visible sides. And in the second case (with the top off) there are four visible sides. In the image below you can see you need to draw 5 shapes with the Pen Tool. Two of the shapes are transparent so that you can see the shapes that are in the back. Every layer has a number so in this tutorial and psd file I will reffer to Box Side 1 Layer, Box Side 1 Layer etc.
In this step all we have to do is to add styles to all the above layers. Gradient Overlay and Stroke is enough to give to our box a nice realistic look. I will start with Box Side 1 Layer. Our box is a cardboard box so we have to apply a color similar to cardboard color. The color for this shape is #ba9636. Having one liniar color is not very realistic because the light falls different on the surface. So let's open the Layer Style Window and add Gradient Overlay like in the image. Change the Blend Mode to Linear Burn, opacity 17%, Style Linear, Scale 100%.
Tip! When you are working with Gradient Overlay(Linear Style) you must adjust the angle of the gradient so that it feets the perspective of the object. The Gradient must be paralel with the object edges in our case the Box Sides.
I want to add a simple border because the cardboard is not that thin as a simple paper. For that use again the Pen Tool.Draw a simple shape above all the other layers like shown in the image. Then with the Shape selected pick again the Pen Tool. Select Substract from the shape area, from the Pen Tool options like shown in the image to create the border.
In the exact similar way draw the Box Top. Create 3 Sides with the Pen Tool each in a different layer. Add Gradient Overlay and Stroke. Be careful to add the corect angle for the Gradient Overlay. The colors for the Top Sides are in the image below:
You know that every object drops a shadow on the surface that is sitting on. So the two objects that need a shadow are the Box and the Box Top. The Box drops a shadow on the surface that is sitting on and the Box Top drops a shadow on the Box. With the Pen Tool simply draw the shadow shapes like in the image. Add color, lower the opacity and you will obtain a result similar to this one :
With The Rounded Rectangle Tool draw a simple shape. Add a 7 px outside Stroke, color #2f1a04. Set the Fill of this layer to 0%. You should now have only the border. Right click on the layer name and Convert to Smart Object. Use Skew option (Edit - Transform menu) and give the right perspective like in the image.
3D Letter Photoshop Tutorial
Photoshop Cat Princess Tutorial