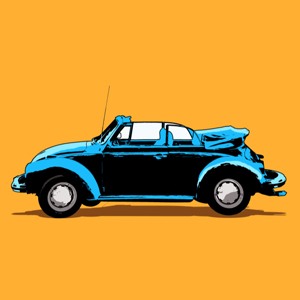
Car illustration Photoshop tutorial - in this tutorial I will show you how to make illustrations in Photoshop using a car vector silhouette and appling color to it. Follow this tutorial and you will create a very cool vintage car illustration that you can print as a poster. In the tutorial I will use the PNG car shapes from a free package, but you can also use the vector car silhouettes. This will allow you to make the car illustration as big as you want without loosing any detail when printing at 300dpi.
Let's make a car illustration in Photoshop . Just follow this tutorial and you will get this beautiful result in less than 10 minutes .
When making layout designs like posters, it is better to use a grid. Press Control+' to show grid. Use a Photoshop Grid to align your design elements.
Create a new layer and fill it with color white. Call this layer Background .
Add one of these free Car Silhouette PNG images in a new layer. Go to File > Place and choose a car silhouette. I used the "car-silhouette-2.png" from this pack.
This pack also contains car brushes , car shapes and car PNG images.
Press Shift-Control-Alt-E to merge the two layers.
Pick the Magic Wand Tool and check Contiguous . Then click on the white background (top left corner) to make a selection.
Press Shift-Control-I to invert the selection.
Press Control-J to make a copy and call it Car Shape . Move this layer below the Car PNG 2 layer.
Delete the Merged Layers layer.
Learn how to color a scanned drawing in Photoshop or how to color lineart in Photoshop in just a few steps.
So, we now have three layers: the background, the car shape and the car silhouette. First add a Color Overlay to the background layer using any color you like. I used the color #ffaf32 for the background.
Add a new layer above the Car Shape layer and call it Coloring . Right click and choose Create Clipping Mask .
Use the Brush Tool and a hard round brush to color the car illustration.
Let's add a Drop Shadow Photoshop effect. Press Control-J to duplicate the Car Shape layer. Rename the Car Shape and call it Shadow .
Press Control-T and resize the shadow.
Add a Color Overlay layer style using the color #624820 for the shadow.
So, here is the final result for the car illustration . You can use different color tones for the car illustration.
Another cool photo effect is the posterize photo effect that you can make in Photoshop using this free action.
How to edit text in jpeg image in Photoshop
Custom Postage Stamps