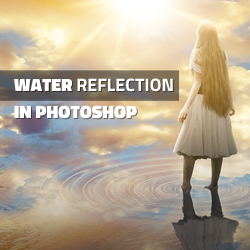
Learn how to create an easy water reflection of a person in Photoshop . All you have to do to make a reflection in Photoshop is to flip vertical the object, to distort it using Ripple Filter or Displace Filter for more advanced realistic effects.
Create a new PSD file, size 800x780px. You can of course use a large size document but to give you an idea about the image proportions. Add this Sky Clouds Texture in a new layer. Press Control-T to scale the layer only on the vertical scale to 80-90%.
Duplicate the Sky Background layer. Press Control-T and flip the image on the vertical scale like shown in the preview. You might have to move the copy layer a pixel up.
Add this Ripple Water Texture in a new layer. Press Shift-Control-U to desaturate the image.
Add a Levels Adjustment by going to Image > Adjustments > Levels .
Go to Edit > Transform > Perspective and change the perspective of the image.
Right click on the Ripple Water Texture layer and choose Create Clipping Mask . Set the Blend Mode to Screen , opacity 75% .
Add a Layer Mask to the Ripple Water Texture layer.
Set the Foreground Color to black. Pick the Brush Tool and with a soft round brush paint inside the mask to hide the line of the horizont
Add this Water Ring texture in a new layer. Change the Blend Mode to Screen .
Press Control-T to resize the Water Ring layer.
Press Shift-Control-U to desaturate the image and use the Eraser Tool with a soft round brush to delete the edges and create a smooth transition.
Add the Girl Cut Out Stock Image in a new layer.
Add a Layer Mask to the Girl Layer . Set the Foreground Color to black. Pick the Brush Tool and with a soft round brush paint over the legs like in the preview.
Duplicate the Girl Layer and flip it vertical. Call this layer Reflection .
For the Girl Layer add this layer style with Inner Shadow (color white) and Gradient Overlay (color #0a0505 and white with opacity variations).
For the Reflection Layer add this layer style with Gradient Overlay (color #0a0505 and white with opacity variations). Also set the Opacity of this layer to 68% .
Go to Edit > Distort > Ripple and set the amount to around 44% to create the water ripple reflection effect.
Create a new layer called Shadow and fill it with white color. Set the Fill to 0% and add a Gradient Overlay style.
Add this sun flare texture in a new layer and set the blend mode to Screen , opacity 65% .
Add a second Sunlight Photoshop Overlay texture and set the blend mode to Screen , opacity 100% .
Go to Layer > New Fill Layer > Gradient and create a radial light effect. Drag the light on the screen over the sunlight.
Go to Layer > New Adjustment Layer > Hue/Saturation .
Press Shift-Control-Alt-E to make a copy of all the visible layers merged. Call this layer Sharpen Image . Go to Filter > Other > High Pass .
Set the blend mode of the layer Sharpen Image to Overlay .
Create a Metal Coin in Photoshop
Create a Zebra Fur Texture in Photoshop from Scratch