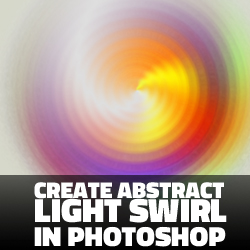
Learn how to create abstract light swirls and circles in Photoshop . For this we'll use Photoshop gradients and distort filters like Twirl Filter and ZigZag Filter . You can create endless light effects that can be used to create light leaks in Photoshop .
In this tutorial we'll create abstract light swirls and light colorful circles in Photoshop from scratch. You can add beautiful rainbow gradients and create all kind of abstract light effects very easily.
Create a new PSD file and set the size that you want. The important thing is that the width and the height to have the same size. So your PSD file must be a square.
Create a new layer and call it Background Layer . Fill the layer with color black.
Create another layer and call it Abstract Light Swirl . Right click on the layer's name and choose Convert to smart object like shown in the preview.
Double click on the Abstract Light Swirl smart object thumbnail to open it. Inside create a new layer called Gradient 1 . Fill the layer with any color you want and set the Fill to 0%. Also add a layer mask to this layer.
Duplicate this layer two times and call the layers Gradient 2 and Gradient 3 .
For all three layers will add a Gradient Overlay layer style and also a gradient for the layer mask. Let's start with the Gradient 1 . First resize the image to around 75%. Press CTRL+T (shortcut to transform in Photoshop).
Click on the layer mask and use the Gradient Tool , with black and white gradient to create a masking effect like shown in the preview. The gradient type is linear (blends the colors of the gradient from start color to end color in a straight line ). Keep the SHIFT key pressed while dragging to make the direction of the gradient perfectly horizontal or vertical in our case.
Go to Gradient 2 layer and repeat the previous step to mask the layer. As you can see in the preview is a lower size mask effect.
Leave the Gradient 2 layer mask white, fully visible layer.
Now let's add Gradient Overlay layer styles to all layers. Go to Gradient 1 layer and add this gradient: #f9e600, #6f156c, #fd7c00 and #f1c578.
Go to Gradient 2 layer and add this gradient: #757575, #8b2580, #94f4f8, #d99f00, #78ee3e and #757575.
Go to Gradient 3 layer and add this gradient: #000000(location 0%, opacity 100%), #000000(location 50%, opacity 0%) and #000000(location 100%, opacity 100%).
Now you can save the smart object ( File > Save ) and close it.
Now we will add three smart filters to the smart object. Go to Filter > Distort > Polar Coordinates .
Now we will add three smart filters to the smart object. Go to Filter > Distort > Twirl .
Now we will add three smart filters to the smart object. Go to Filter > Distort > ZigZag .
So here is the final result for abstract light swirls and circles in Photoshop . You can change the gradients and obtain different color effect.
These images can be used as light effects , light leaks , etc. Simply set the blend mode to Screen or Lighten and you get a cool effect.
Create Water Surface Texture in Photoshop from Scratch
Electric Lightning Text Effect In Photoshop