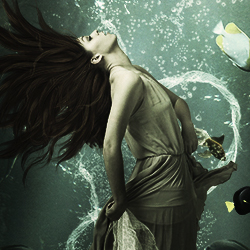
Learn how to create an underwater mermaid in Photoshop using some simple blending techniques and layer adjustments. You can practice this beautiful photo manipulation using other underwater backgrounds to create something truly unique. Undersea photo manipulations are among my favorites Photoshop artworks. Hopefully you will all enjoy reading this new Photoshop tutorial.
Stock images used in this tutorial
Create new file with canvas size 2600px x 3300px.
Place the "Ocean Stock" into your file and transform it (CTRL+T) like the picture below.
Duplicate the "Ocean Stock" (CTRL+J) and transform (CTRL+T) as shown below. Now create a layer mask and paint inside using the Brush Tool .
Place Underwater stock into your file. Add a layer mask and hide the bottom of the layer painting with a big size soft round brush.
Place Gold Fish into your file. The best way to precisely cut image in Photoshop is by using selection tools ; by far the best method is to trace the shape using the Pen Tool .
Place the Girl image into your file. Create new layer and go to Edit > Fill and select 50% Gray. Use Dodge tool (25% opacity) and paint on the girl to lighten the image. Blend mode set ot Overlay with 20% Opacity.
Create a new layer, select the Brush Tool and use white color as Foreground color and paint over like shown in the picture with blend mode Soft Light , 20% opacity. Make two copies (CTRL+J) with opacity 13% & 29%. Select all the 3 layers, right click and choose Create Clipping Mask .
Create new layer, pick the Brush Tool , chose Bubbles brushes and add them behind the girl layer.
Place "Textiles" into your file. Create new layer with Clipping mask and paint with black color on the parts that are shown in the picture below. Blend mode set on Screen .
Place the Hair stock image into your file. Make six copies (CTRL+J)
Create new layer, again use the brush tool and chose Bubbles to paint as shown below.
Place "Textile 2" and add them in the girl's hand. Blend mode set to Screen with opacity 94%. Create layer mask and use a soft round brush.
Place "Bubbles2" into your file. Blend mode set to Lighten .
Place fish stock image into your file. But before you place, use the Pen Tool to cut fish and to remove the background. Duplicate layer (CTRL+J) as in the image below.
Place "Bubbles3" stock image into your file. Set the blend mode to Screen ; create a layer mask and paint with a big size soft round brush.
Create new layer and use the Rectangular Marquee Tool and make white lines as shown below. And go to Filter > Blur > Gaussian Blur and use 100%. Opacity set to 30%.
Place "Underwater Light" into your file. Blend mode set to Screen with 35% opacity. Now create a layer mask and use the brush.
Place "Underwater partition" into your file. Cut the middle of the image with the Polygonal Lasso Tool and set the blend mode to Color with opacity 50%.
Place "Underwater" into your file and set the blend mode to Soft Light with 75% opacity.
Now place another "underwater stock" photo into your file; create a layer mask and use the brush. Decrease the brush opacity. Blend mode set to Soft Light with 70% opacity.
Settings for Older Photoshop Versions
Settings for Photoshop CS6
If you want to make the image even more interesting you can add a lens flare effect using the Photoshop Lens Flare Filter :
Here is the final result for this beautiful undersea Photoshop manipulation tutorial; I hope you all enjoyed reading and practising this new tutorial.
Angel with Fire Wings Photoshop Manipulation Tutorial
Halloween Night Witch Photoshop Manipulation Tutorial