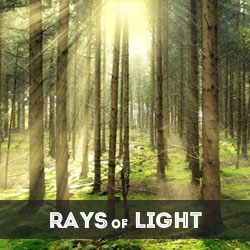
This is a quick create rays of light in Photoshop tutorial that might prove really useful especially for Photoshop beginners . You can instantly change a photo by adding sun light effect . We'll learn how to create a sunburst and how to combine it with lens flare for obtaining an intense light effect. You can add rays of light to any image that has a light source, but it works best for the sun light.
If you want to create rays of light in Photoshop in just a few steps, you can try this action.
In this quick tutorial I will show you two methods in which you can create rays of light in Photoshop from scratch using some filters. I will start with this beautiful forest stock image that it has some light coming between the trees but I want to make the rays of light more obvious. Call this first layer Forest Image
Duplicate the Forest Image layer two times and call these two layers Rays of light 1 and Rays of light 2 . Go to Image > Adjustments menu and choose Threshold with these settings.
Now go to Filter > Blur menu and choose Radial Blur using these settings. Make sure you move the Blur Center to the top center of the image.
Change the blend mode of the Rays of light 1 layer to Screen . I have also added a Hue/Saturation adjustment layer with Colorize option to add a soft yellow color to the rays of light. Don't forget to set the adjustment as clipping mask for the Rays of light 1 layer.
Instead of the Hue/Saturation adjustment you can use a Gradient Map adjustment layer.
Now go to the Rays of light 2 layer and use the Threshold again this time with different settings.
Now add again the Radial Blur with the same settings; add Hue/Saturation , change the blend mode to Screen - identical steps made for the previous layer. So here is the result so far:
To make sun light effect more realistic you can add a layer mask to each Rays of light layers and simply use a soft round brush, colr black to paint inside the layer mask to hide some areas.
To make the rays of light more vibrant you can add a Brightness/Contrast adjustment layer above the Forest layer. Paint with black inside the layer mask of the Brightness/Contrast adjustment layer, to lighten the center of the image.
To add more light in the center of the image you can add this Sun image. Set the blend mode to Screen and also add a soft gaussian blur.
You can also add a lens flare effect. See how to Create Lens Flare in Photoshop from this quick tutorial.
Make a new empty layer above all the other layers. Press Shift-Control-Alt-E to make a copy of all the layers. Go the Filter > Other > High Pass .
Set the blend mode to Overlay , opacity depending on how darker you want the shadows to be. You can set the opacity between 42% and 70%. Use the Burn Tool to darken the trees and to create more shadows.
So here is the before and after adding sun light effects in Photoshop. You can use any other daytime image and add rays of light and sunburst like we did in this tutorial. You will obtain similar if not better results.
This part of this tutorial will be published soon so stay tune!
Vintage Christmas Greeting Card in Photoshop
Santa Hat Knitted Christmas Text Effect in Photoshop