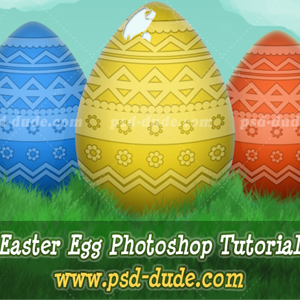
Easter is coming soon, so in today's tutorial, I will show you a simple way to create an egg in Photoshop . The egg is made from scratch and it is created as a vector shape so you can resize without loosing its quality.
It will take you no more than five minutes to draw these beautiful decorative eggs. They are perfect for creating Easter cards . If you want, you can follow the easy way and use one of my egg shapes . Hope you like it!
Open a new psd file, size 500x500 pixels. Add a #8bd5c8 background layer. With the Ellipse Tool and draw a simple elliptical shape, the color is not important, I have used a brite yellow color. Call this layer Egg Layer.
Before we start drawing you might want to check out our awesome tutorial about how to draw a line in Photoshop . This will teach you the basics for drawing straight lines and curved lines and will make following this easter egg drawing tutorial much easier.
Let's remodel the shape to look more like an egg. Use the Convert Point Tool to make the top point of the egg more sharp. Select the top point that describes a curve between two lines. You see two handles are being created. These handles determine how acute the curve will be and the direction that you are wanting to draw the curve. Simply make the handles lines smaller by dragging them closer to the anchor point. Press CTRL+' to see the grid. This grid will help you make symmetrical moves. With the same Convert Point Tool and select the two anchor points from right and left and move them down like in the image. Now we have a nice egg shape.
As you can see our egg looks too flat, it doesn't have that tridimensional look. Open the Egg Layer Style Window and let's add some cool effects. First let's add a simple Gradient Overlay, with two tones of yellow. You can of course use red, green or other color. Add Inner Glow as shown in the image: Add Inner Shadow, use black for the shadow.
So far we have a nice looking vector egg. Time to add easter decoration to our little egg. Because we have a vectorial shape and I intend to keep it that way, I have decided to use some Photoshop Custom Shapes that I have made a week ago. So download the Photoshop Shapes Inspired by Romanian Folk Art and load them in your Photoshop program.
Create a new layer and call it Decoration Layer. Use white for the shape color. I will now add a round curved shape to the decoration layer. To do that go to Edit, Transform and choose Warp. You can see a white point. Simply drag it down. Add a little 2px black Stroke to our Decoration Layer. Change the opacity of the layer to 30%. Right click on the layer name and Convert into Smart Object.
Press CTRL and click on the Egg Shape Thumbnail as shown in the image. Return to the Decoration Layer and with the egg shape selected press Add Layer Mask. You can see that now from the decoration it is visible only the egg area.
The egg is standind on a horizontal surface so I want to add a little shadow or refraction. In fact I don't know if it is shadow or reflection. Select the two layers and create a group. Convert this group into smart object. Flip it Vertical. Now make a selection with the Rectangular Marquee Tool. Add Layer Mask. Lower the opacity to 30%.
You can add little cracks on the egg surface for a more realistic look and that is all.
Did you enjoy this tutorial? Check this out:
Glowing aura around a person
Rusty Silver and Gold Text Effect