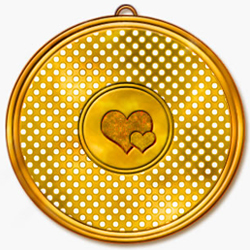
In this tutorial I want to show you a simple way to make a piece of golden jewelry - a golden medallion or locket. You will learn an easy way to make gold texture and also to work with Photoshop patterns.
Go to this pattern and download the pattern; you have there the instructions on how to install pattern and how to use them. Or you can use this high quality halftone textures .
Open a new document 400/400 px .
Now we have to make a gold texture .you can copy a gold texture if you preffer; set background color: 4e3c06 and foreground color: e4b116. Go to Filter - Render - Clouds. Resize this layer to 70 %. Go to Filter - Artistic - Watercolor (brush detail:14 ; shadow intensity: 0 ; texture: 1)
I advise you to keep this texture in a layer and hide it. Duplicate the layer for further steps.
Now make a circle in a new layer. Right click on the name of the layer and go to Blending Options and choose the pattern that we downloaded earlier. You should obtain something like this:
Duplicate this layer 2 times .you will have 3 layers with the circle
Merge layer 1 with layer 2, the result is that the shape 2 is rasterized (not vector enymore) and this layer doesn't have a pattern in Blending options.the pattern become a picture and we can work with it.
Be careful always to have a copy of the Vector circle, so duplicate the layer as many times as you need. Now, with the CTRL key pressed click on the red from layer 3. You will notice that a circle is selected.go to texture layer and press CTRL+C and than CTRL+V. A new circle layer was created with a gold texture.
Now go to layer 2 and with the Magic Wand Tool click a black circle.the result is that all the black circles will be selected...With that area selected go to Gold circle layer and press delete key. If you hide layer 2 and texture you will have something like this:
Go to Blending Options og Gold circle layer and do the following settings: color b88e0e
Do you remember layer 3? Vector circle layer ?
Duplicate that layer and call it Border layer . Rasterize border layer and resize it (Edit - Transform path - Scale) to 110 % . Press CTRL and click the black part from layer 3 (the one marked with an red X in the image below) and go to border layer and click delete key.
Now go to Blending options of the Border layer and do the following settings:
Duplicate this Border layer and resize it to 90%. You should obtain somethind similar to this:
Now draw a circle in the middle; press CTRL and click the texture layer and click CTRL+ C and CTRL+V ... you have as a result a circle with texture. Go to Blending Options of this layer (circle with texture) and do the following settings :
Duplicate this layer and resize it to 90 %. You should now have something similar to this :
Now you know all you need to know so you can add from Custom Shape Tool
2 hearts . see Step 9 , the only exception is that I made the texture a little darker for contrast.
Make a new layer on top of all the others (Layer - New - Layer) and than go to Image - Apply image ; The result will be a new layer that contains the all the visible layers from this document(all the visible layers merged). Now you can play with Burn Tool, Dodge Tool and Sponge Tool(saturate) different sizes and exposures to make this image look more like gold. The second image is after these effects.
Turning a girl from young to old
Make an alien out of a real girl or woman in photoshop