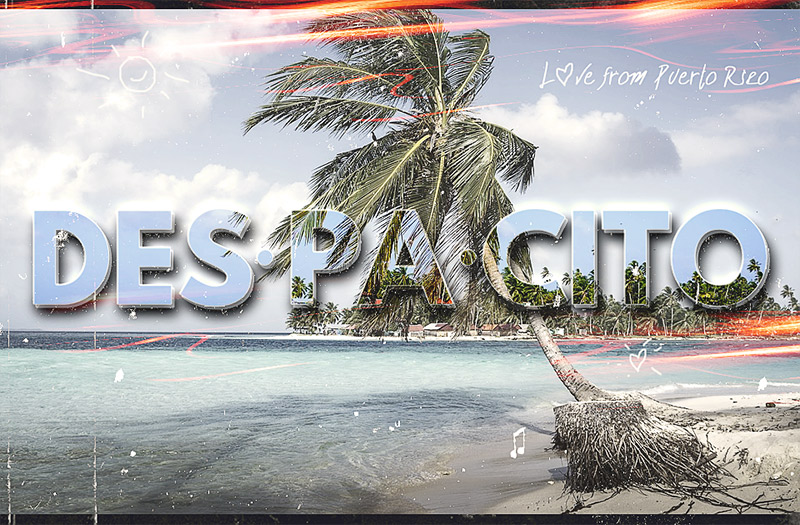
Learn how to fill text with image in Photoshop . The same technique works for adding a text over an image in Photoshop. To create this text effect we use the text as a mask for the image.
While working on a simpler edit text in image Photoshop tutorial, I got inspired to create this tutorial.
By the way, you should also check out some online alternative tools to Photoshop (for example MockoFun ) as sometimes things like writing your name on image can be done so much faster like that.
For this tutorial you will need these stock images, textures and other resources.
Create a Background layer and fill it with color #000014.
Add this Sand Beach Tropical Island image in an new layer.
Add a Gradient Map adjustment layer. The colors for the gradient are #4e4e4e and #ffffff. Set the opacity of this layer to 66%.
Add a Text layer and write something using the League Spartan Font type. My text layer is "Despacito" which is the title of a famous song that I love. "Despacito" is a Spanish diminutive word ("Slowly" in English) that inspired me to create this text effect.
Divide the words into syllables by leaving a blank space ("DES PA CITO") and use capital lettters.
Use the Ellipse Tool and add a circle between the syllables.
Select the two layers (the Text layer and the Circle shapes layer) and right click on the layers and choose convert to smart object . You can use only the Text layer if you find it easier.
Rename the smart object, Text 1 . Press Control-J to make a copy of the smart object layer. Name it Text 2 .
Add this layer style to the Text 1 layer.
Add this layer style to the Text 2 layer.
Move the Text 2 layer a few pixels up and left.
Duplicate the Beach layer and place it above the Text 2 layer. Right click and choose Create Clipping Mask . Move the Beach image; that way you have another image inside the text.
In a new layer add this Grunge Texture and set the blend mode to Lighten .
Add a Levels adjustment.
I added the text "Love from Puerto Rico" using the Biffes Calligraphy font . Use the doodles brushes to add cute details.
To add more scratches and make the image look like an old movie, use this Old Film Texture . Press Control-I to invert the colors and set the blend mode to Lighten .
To create that party fiest vibe, use this Light Wavy Lines texture overlay. Set the blend mode to Screen .
To create a sepia effect, apply a Photo Filter adjustment layer using the color #ab8e35.
Press Shift-Control-Alt-E to make a copy of the layers. Go to Filter > Other > HighPass . Set the blend mode of this layer to Overlay to obtian a sharpen photo effect .
Now you know how to fill text with image in Photoshop. You learned how to create a transparent text or a see-throught text ( Text 1 layer style) and also how to create a text mask in Photoshop ( Text 2 layer style).
For this tutorial I made a cover image for my favorite song "Despacito" using stock images, layer styles and textures.
Rose Petals Floral Text Effect Photoshop Tutorial
How to Put a Border Around an Image in Photoshop