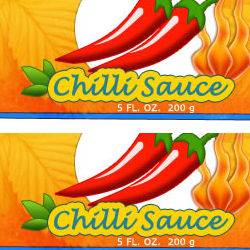
In this photoshop tutorial I will show you how to make a nice label for your favorite chili sauce.
Step 1 - Draw the Shape of the Label
With the Pen Tool make a shape similar to the one below,
change the shape color to #1385fc. Call this layer Label1.
Now go to Blending Options for this layer (right click on the layer's name) and do the following settings:
Step 2 - Color to the Label
Duplicate Label1 and call it Label2.
Resize the new layer aproximatly 98 % width and 94% height.
Go to Blending Options for this layer (right click on the layer's name) and do the following settings:
Step 3 - Add the first detail
Create a new layer with a white circle with this settings for Blending Options
and place it like in the picture below:
Step 4 - Add Texture to the Label
Now create a new layer and go to cgtextures.com and download this photo . With the Lasso Tool select the leaf like in the picture below, rotate it to look just like this. Now duplicate this layer and rotate the leaf again. Merge the 2 layers and call in LeafTexture.
Change the Blending Mode of this layer from Normal to Soft Light
The result looks just like that
Step 5 - Draw the Chilli Pepper
Let's make a red pepper. Take the Pent Tool and make this shape. Add a green tail and than with the same tool add a light spot on the pepper.
Image 1 Image 2 Image 3
The Blending Options settings for the 3 images/layers are:
Step 6 - Add the second Chilli
Duplicate this pepper and move it to the right
Step 7 - Write the Text
Write "Chilli Sauce" in a new layer
And go to Blending options and do the settings
! Make a new blank layer and merge the 2 layers
Now go to the Blending Options of the new created layer and make:
Step 8 - Add little Leafs
Make a little leaf shape with Pen Tool and do
Make three leafs like that resize two of them , rotate and place them like in the picture below
Step 9 - Draw some Flames
Let's make some flames:
For this image you will have to make with Pen Tool a shape like that. In the Blending Options window do the following settings:
Duplicate this flame tree times, rezise , move and obtain something like this.
I will now merge the tree layers and go to Filter - Liquify and change the shape of the flames with Forward Warp Tool.
You should now have a picture like that:
Step 10 - Complete the Label
Lets add some final touch:
"Italy Product " white text on left side vertical
"5 FL. OZ. 200 g" white text
Ingredients text on the right side
And "ALL BIO" text on top of the label
And this is the result:
Woman engraved in stone
Funny Cartoon Rainbow